


- Size Guide
- Reviews (11)

| Size | DHL Box | Internal Dimensions (cm) | Max Weight (kg) | FedEx Equivalent (approx.) |
|---|---|---|---|---|
| XS | Box 2 | 33.7 × 18.2 × 10 | ~1 | Small Box (8″×8″×8″) |
| S | Box 3 | 33.7 × 32.2 × 10 | ~2 | Medium Box (12″×12″×10″) |
| M | Box 4 | 33.7 × 32.2 × 18 | ~5 | Large Box (13″×13″×11″) |
| L | Box 5 | 33.7 × 33.2 × 34.5 | ~10 | FedEx 10kg Box (40.16 × 32.86 × 25.88) |
| XL | Box 6 | 41.7 × 35.9 × 36.9 | ~15 | FedEx Large (16″×16″×16″) |
| XXL | Box 7 / 8 | 48.1 × 40.4 × 38.9 or 54.1 × 44.4 × 40.9 | ~20–25 | FedEx Extra Large (42 × 42 × 47) |
11 reviews for General Tools Woodworking Dovetail Jig – 12″ Template Kit for Furniture & Wood Cabinet Making,Gold
Add a review
Related Products
 12 in Hand Lifting Jack Tool, Multifunctional Furniture Lifter Tool, cabinets Door Paneland Windows Lifting Jack ,Raised by 6.7 inches, Bearing 360LBS")
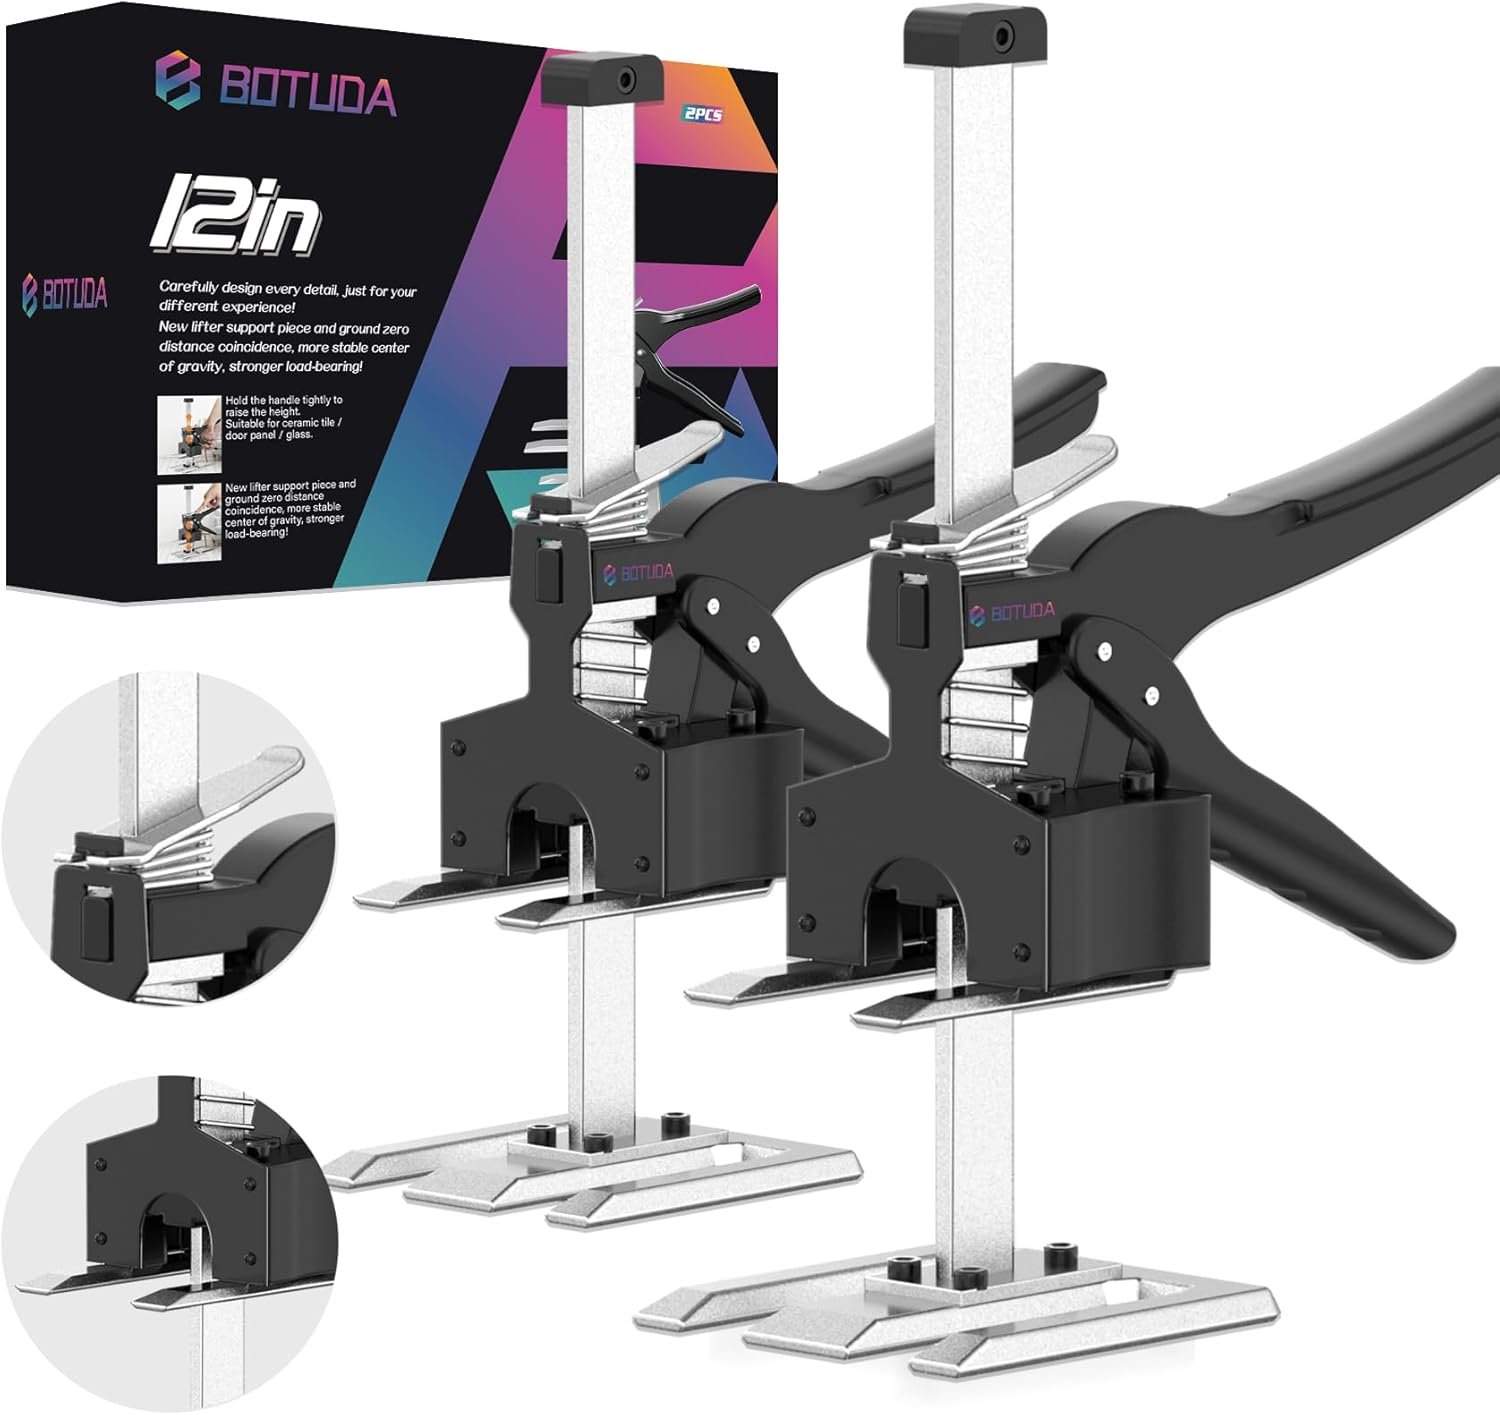
2025 New Labor Saving Handle(2Pack) 12 in Hand Lifting Jack Tool, Multifunctional Furniture Lifter Tool, cabinets Door Paneland Windows Lifting Jack ,Raised by 6.7 inches, Bearing 360LBS
Original price was: $56.99.$49.44Current price is: $49.44.


 Resettable Combination Lock, Anti-Theft Coiled Secutiry Cable for Bicycles, Kayaks, Paddle Boards, Gates and Outdoor Gear (5 FT)")
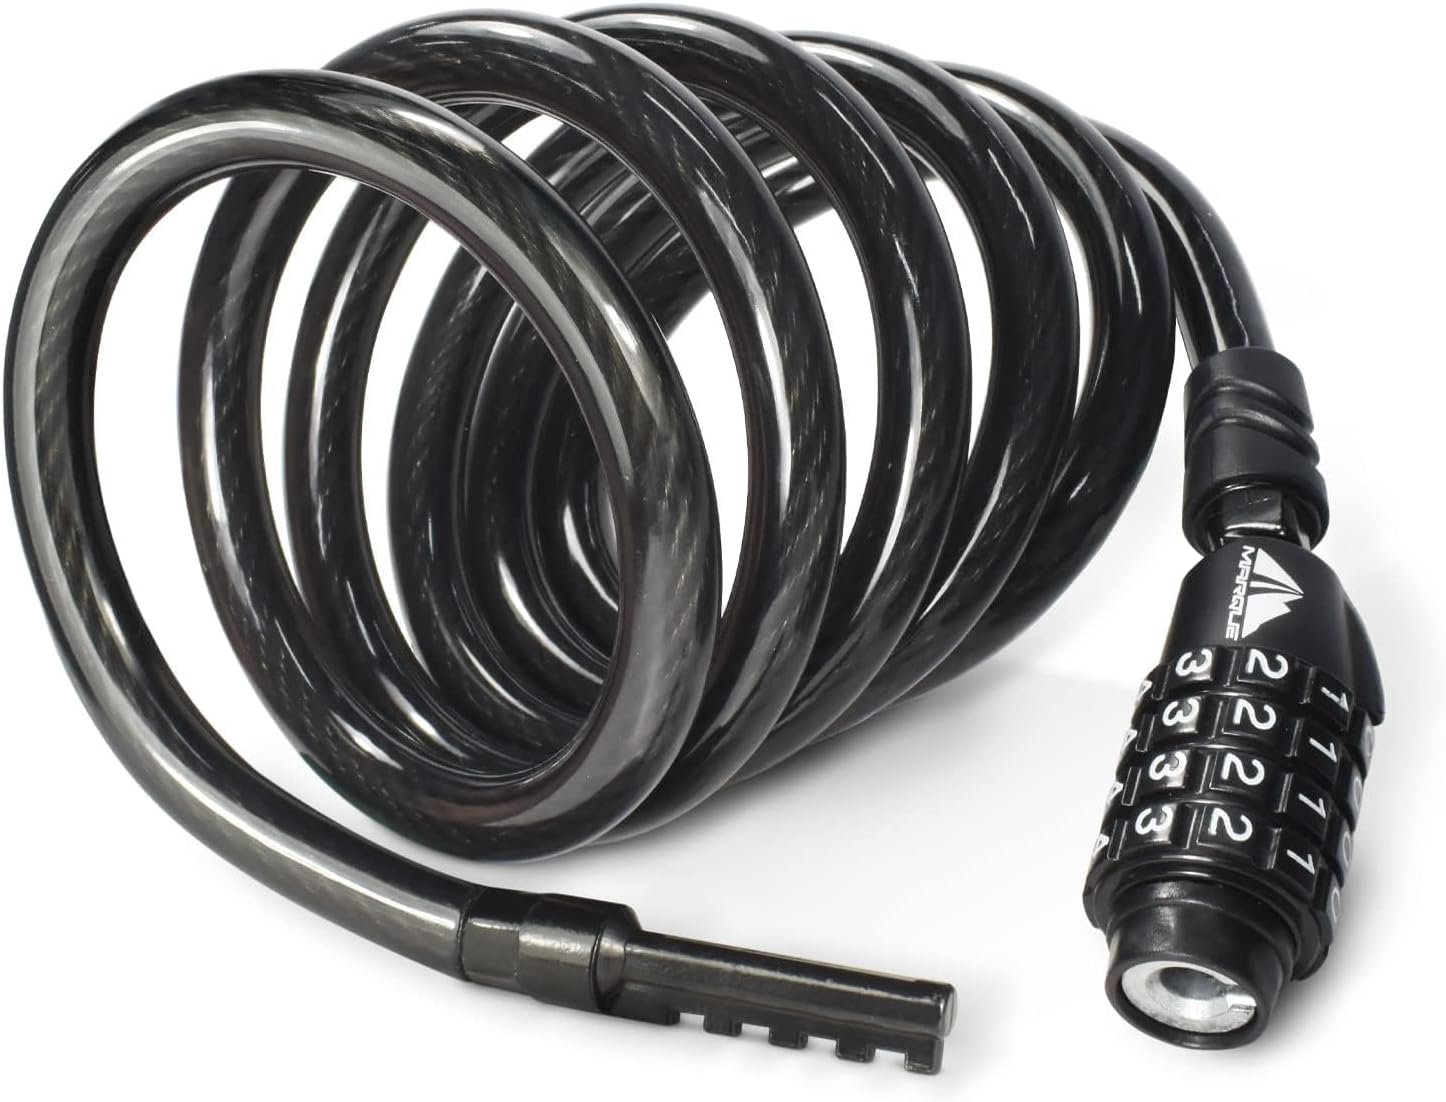
MARQUE Combination Bike Lock Cable- 3/8 inch (5FT, 10FT, 15FT, 25FT) Resettable Combination Lock, Anti-Theft Coiled Secutiry Cable for Bicycles, Kayaks, Paddle Boards, Gates and Outdoor Gear (5 FT)
Original price was: $18.99.$20.69Current price is: $20.69.

David Mckenzie –
stroke victim
I have a Kreg router table with a Bosch 1617 router, and a Jess em Lift. Feud Bits and now my set up is complete with the General Dovetail and box joint jig. Works as advertised, Price is great and you tube videos also. A must have in the shop.
J K –
For the recreational wood worker that wants to create quality drawers
After a couple of practice joints, you’re good to go. Not sure for a professional, but for a weekender… worked great. Hardest part was setting up the clamps, so the jig doesnt move.
jblues –
Not tight, loose actually
After some playing and watching videos plus several test pieces I got it looking nice and nearly flush. I am sure after glue up it will be fine. I like my fits to slightly hold if I turn upside down, friction fit that is. There is about 1/32 -1/64 gap in fitment. The wood will swell, but just not how I like it. I used it in my router table.The instructions are confusing, could be made much simpler. It is not difficult to use once understand the measurement settings.Set router to set the depth of the pins. In other words it sets the depth of the half blind or how proud throughs will go. The depth on the other side is always the thickness of the board.Like others said the plastic portion is itâs weak link. Does not sit flat and the slide gives some. The aluminum is also soft. Donât over tighten the clamps it will bend. For production style drawers this unit will work fine. If you have a bunch to do it is worth it. If you want to make dove tails for show pieces I would probably look elsewhere. These just arenât that tight, no way to make it tighter. Also stand a fair chance of being slightly out here and there. I would hate to screw up some nice curly, white oak, walnut or exotic sho
bobby foresta –
Simple and accurate
This was really easy to use especially on the router table. I’m only using it or half blind dovetails. I use another simple jig for box joints and I do through dovetails by hand. It took me a few tries to get the bit height and depth of cut (with the depth gauge) just right it was too tight at first but once I adjusted the bit height and depth gauge slightly I got the results I wanted. One thing to know is the inner sides face you as you’re routing on the router table. It all aligned well the alignment with the depth gauge fingers make the parts line up top and bottom very well. This is exactly what I hoped.. a repeatable accurate simple way to make half blind dovetails without having to take a college course in jig set up the videos on-line helped a lot and the manual was good
Smokey –
Good but bent
I like it but one end is bent slightly, and router hangs up there. Can I get a replacement for it or just bend it myself?
Peter Kavouras –
Does not work as advertised (or at all really)
I had to wait a week to write a review about this product so that I could come at this from a place of logic rather than anger. I bought this product with the intent of making box joints or dovetailing a box that I was making for my son’s school group. For reference, I have been doing woodworking in my home shop for about 15 years and have made both box joints and dovetails by hand. I read other ratings and watched a couple videos and then bought the product thinking I was getting a well made item that would help me make dovetails much more quickly than I could do by hand. I was wrong.First I tried box joints. The packaged instructions claim box joints are a viable way to use this product…the instructions are wrong. I did not have a pattern bit handy so I figured I’d use the bearings off the dovetail bit that came with the product…warning- the bearings do not fit on the shafts of other 1/4″ shaft drill bits…So I instead invested in a pattern drill bit at the store. I tried to make box joints on several practice pieces and they just would not line up…I tried 5 or 6 times and made a dusty mess to no avail. I looked for a video on line to see if anyone else had tried the box joints, but I could not find one…I guess that is because it doesn’t work. As a side note, the instructions say you need to add a 1/4″ shim to the front to make the box joints work…why isn’t the shim included with the product?! Although, I guess that doesn’t matter, because it isn’t possible to line the joints up anyway.So, I regrouped and decided to go ahead with the dovetail joints…that’s what the product is supposed to be best at, right? First off, the bit they give you with the package is not good. It is not sharp enough and after practicing with it several times one of the tines broke off the bottom. So, back to the store to buy another bit, this time a dovetail bit. The new bit (a Bosch) was great and the cuts were fairly clean, even in plywood. Only one problem now…the dovetails would not line up. No matter what I tried…raising the bit, lowering the bit, going slower, going faster, different routers, standing on one leg and chewing gum, you name it I tried it. I watched the on-line videos a couple more times…I have no idea what magic they used to make this thing “work” in the videos, but mine would not line up. I finally gave up and made cabinet joints on my table saw.I spent 7 hours of my life that I can never get back, $46 dollars on this product, another $40 on router bits I shouldn’t have needed, and used up a whole lot of perfectly good scrap wood only to find that this product is flawed and does not work as advertised (and therefore not at all).
Snopo –
Das Teil kommt in einer ordentlichen Verpackung und man sieht sofort, dass es für den amerikanischen Markt gemacht ist. Offenbar hat man im Laufe der Zeit auch immer wieder Kleinigkeiten verbessert, z.B. die Befestigungen für das Werkstück (sieht man in alten Videos).Es ist vollständig aus Metall (Aluminium) und ordentlich verarbeitet. Montiert werden muss nix. Man kann lediglich die beiden Griffe für die Arbeit am Frästisch anschrauben und muss sie wieder abschrauben, wenn man mit dem Fräskorb arbeitet.Bzgl. US-Produkt: Die Anleitung und das Video sind natürlich auf Englisch. Alle Angaben sind in Zoll (2,54 cm). Der beiliegende Fräskopf ist auch mit einem 1/4″ (Zoll) Schaft – den legt man am besten gleich zur Seite, weil der sowieso nicht in eine Standard-Fräse für den deutschen Markt passt, und kauft einen mit 8 mm Schaft in besserer Qualität (gibtâs hier z.B. von ENT 16200).Man sollte sich schon mal einen Tag Zeit und diverse Probebrettchen nehmen, zusätzlich die Anleitung und das Video schauen, bevor man richtig loslegen kann. Es ist wirklich nicht schwer und macht richtig SpaÃ, wenn man den Dreh raus hat. Schwalbenschwänze erklärt das Video sehr gut. Das beschreibe ich hier nicht extra, werden aber ordentlich (s. 6. Foto) und halten auch.Bei den Zinkenfräsen braucht man wieder einen mit Kugellager am Schaft (Bündigfräser). Der Durchmesser muss genau 12,7 mm sein (1/2″), sonst fräst man zu viel oder zu wenig und die Zinken passen nicht.Er muss um die Länge der Werkstückdicke + Dicke der Zinkenschablone (ca. 7mm) + Zugabe (ca. 0,5mm) herausragen UND (das gilt auch für Schwalbenschwänze) dann immer noch mit dem einen Kugellager an der Zinkenschablone anliegen.Denn – aufpassen: Die Zinkenschablone hat nach hinten eine geringere Dicke (S. 3. Foto). Wenn man die Frästiefe nicht richtig einstellt, schrammt man gleich mit dem Fräserschaft an der Schablone entlang oder man rutscht ab!Das ist bei den Schwalbenschwänzen noch relativ einfach einzustellen, bei Zinken aber schon tricky, weil der Fräser dann nicht mehr lang genug ist. Ich habe mir so geholfen, dass ich das Werkstück weiter nach hinten und nach oben versetzt habe (s. 4. Foto) mit einem 12 mm Brett als Zwischenstück gehtâs (es entsteht eine minimale Lücke, vermutlich 0,7 mm, ist aber nicht schlimm). Und dann bekommt man perfekte Zinken (s. 1. und 2. Foto mit Ãberstand und plan geschliffen – da war ich etwas hastig, ist ja nur zur Probe).Kurze Anleitung fürs Einstellen der Zinken: Erstes Brett einspannen und den Fräser an der linken Seite der Zinkenschablone entlang führen. Nur links! Wir wollen genau 12,7 mm oder 1/2″ heraus fräsen.Zweites Brett dann an der rechten Seite der Zinkenschablone entlangführen.Markierung: Hat man das erste Brett gefräst, legt man beide bündig übereinander und zeichnet die Lücken vom ersten auf das zweite Brett. Dann markiere ich immer noch die Teile, die ich wegfräsen will (weil ich sonst unter Garantie die falschen Teile weg fräse) und stelle den rechten Rand der Markierung so ein, dass er bündig mit der Zinkenschablone verläuft (Ablauf, s. 5. Foto).Werkstück festspannen und wie oben erklärt an der rechten Seite entlang fräsen.Schaut man sich die Markierungen an, sieht das unlogisch aus, als ob zu wenig weggefräst wird – aber es funktioniert!Mit Fräskorb oder am Frästisch arbeiten? Ist eine Philosophie-Frage. Wenn man sich sicher genug fühlt ist die Frästisch-Methode sehr komfortabel, denn das Festspannen der Schablone wird schnell lästig. Beim Frästisch spannt man das Werkstück ein, dreht das Ganze um und legt los (Links und rechts auf der Unterseite markieren, sonst kommt man durcheinander). AuÃerdem fliegen die Späne nach hinten weg und können abgesaugt werden. Mit Fräskorb fliegen die einem immer ins Gesicht.Zinken und Schwalbenschwänze sitzen schon ohne Verkleben bombenfest und ich brauche einen (Schon-)Hammer, um die wieder auseinander zu bekommen.Also klare Kaufempfehlung und trotz der englischen Anleitung 5 Sterne, weil es mir gefällt, dass das Produkt komplett aus Metall gefertigt ist und sich mit dieser Farbe schon fast als Deko-Objekt anbietet!
Paulo De T. Cambraia –
Fácil de usar, na primeira tentativa obtive bom resultado
Titi –
Dommage que la notice d’utilisation soit si peux fourni et expliqué clairement…
Ouch –
A terrific product for the less skilled of us who want aesthetically pleasing dovetail joints. Well manufactured and robust, easy to use.
Christopher Klassen –
Great tool! Perfect for dove tails and half blind dove tails.